
 By
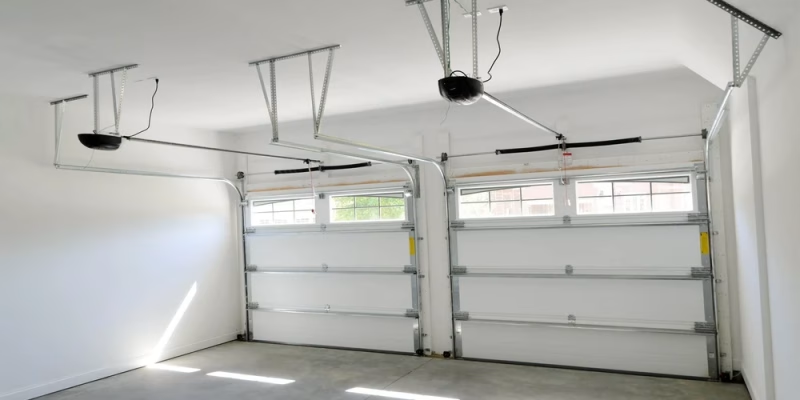
A garage door that groans at every lift or resists opening on chilly mornings can be more than a nuisance. If you’re thinking about adding the convenience of an automatic opener, the first question is whether your existing door is even up to the task.
Assessing Your Garage Door’s Compatibility with Openers
Not every garage door can accept a modern opener. The design and construction of your door make all the difference when it comes to installation.
Modern Sectional Doors vs. Older One-Piece Doors
Most newer garage doors are built with horizontal sections that bend as they rise. These “sectional” doors are opener-friendly because the hardware can grip and pull them along the track with ease. In contrast, older doors are often made in a single rigid sheet. If yours is one big panel, it’s likely not compatible with standard openers and may require a full door upgrade before you proceed.
Key Features That Enable Opener Installation
A door that’s ready for an opener will move smoothly and evenly along its tracks. Check for the following:
– Horizontal Segments: Multiple sections rather than a single panel.
– Balanced Weight: The door should stay in place when open halfway, without quickly falling or rising.
– Functional Springs and Rollers: No sticking, jerking, or scraping as it moves.
If your door lacks these features, an opener could struggle or even cause damage.
When to Consider Replacing Your Garage Door First
If your current door is warped, rusted, or consistently difficult to lift by hand, an opener won’t solve the core problem. In cases where repair isn’t practical, replacing the door is the safer investment. Modern doors offer better insulation, durability, and quiet operation, well worth considering before automating.
Comparing Garage Door Opener Types and Models
Finding the right opener means weighing drive type, features, and long-term reliability. Here’s a breakdown of your main options:
| Opener Type | Pros | Cons | Best For |
|—————-|—————————————-|—————————————|—————————-|
| Chain Drive | Affordable, strong, widely available | Noisy, more vibration | Detached garages, heavy doors |
| Belt Drive | Quiet, smooth, low maintenance | More expensive | Attached garages, bedrooms nearby |
| Screw Drive | Fewer moving parts, decent speed | Sensitive to temperature fluctuations | Moderate climates |
Features to Look for Based on Door Type and Usage
Heavy wood or insulated doors may need a more powerful motor, while lighter aluminum doors can use basic models. Smart connectivity, battery backup, and automatic locking are popular features that boost safety and convenience.
Budget Considerations and Long-Term Reliability
While a basic chain drive opener may seem cost-effective, consider noise levels and potential repairs over time. A higher upfront cost for a quality belt drive often means quieter operation and fewer headaches in the long run.
DIY Installation: Process, Tools, and Safety Considerations
Ready to tackle the project yourself? Here’s what you need to know.
Step-by-Step Installation Overview
1. Confirm Compatibility: Double-check your door type.
2. Gather the Right Tools: Typically, you’ll need a drill, wrenches, screwdrivers, tape measure, and sturdy ladder.
3. Install Mounting Brackets: Attach them to both the ceiling and door according to the opener instructions.
4. Assemble and Attach the Rail: Secure the rail, then fit the trolley and carriage.
5. Connect Power and Controls: Wire the opener, install the wall control, and sync any remotes.
6. Test the System: Open and close several times, checking for smooth motion and proper stops.
Common Challenges and How to Troubleshoot Them
Misaligned tracks, loose hardware, or a door that refuses to balance are common hiccups. Adjusting the springs or correcting track alignment usually solves most issues, but always prioritize safety, springs store a dangerous amount of tension.
Necessary Tools and Safety Precautions
Wear eye protection and keep children away during installation. If your ceiling joists aren’t sturdy, reinforce them before mounting any hardware.
Professional Installation: Advantages and When to Hire Experts
DIY might save some money, but it’s not ideal for everyone.
Benefits of Hiring a Certified Garage Door Specialist
Professional installers bring experience and efficiency. They’ll spot compatibility issues, handle complex wiring, and ensure safety features are calibrated correctly. The peace of mind from a certified installation can outweigh the cost.
Situations That Call for Professional Help
Tall doors, heavy or old doors, and any uncertainty about your own skill level are all good reasons to call in the pros. Also, if your garage has unique construction or tight spaces, an expert can problem-solve on the spot.
Warranty and Service Guarantees Explained
Many professionals offer warranties on both parts and labor. This means any issues that arise in the first year or more will be covered, saving you from unexpected repair bills.
Cost Comparison: DIY vs. Professional Installation
How do the expenses shake out? Let’s break it down:
| Category | DIY Installation | Professional Installation |
|———————-|——————–|——————————–|
| Opener Kit | $200-$500 | Usually included or markup |
| Tools | $0-$75 | Provided by installer |
| Labor | Your time (4-6 hrs)| $200-$400 |
| Warranty | Basic/limited | Often 1+ years, full coverage |
| Risk of Mistakes | Higher | Minimal |
Hidden costs can pop up if you buy specialty tools or have to redo work. Professionals often get it right the first time.
Testing and Maintaining Your Garage Door Opener After Installation
Once installed, a few quick tests confirm everything’s working as it should.
How to Perform Initial Functionality Tests
Open and close the door several times, using both the wall button and remotes. Check that it reverses direction when an object blocks the path. Listen for unusual noises that could indicate a misalignment.
Routine Maintenance Tips to Extend Opener Life
– Lubricate hinges and rollers every six months
– Tighten any loose bolts or hardware
– Replace remote batteries annually
Signs Your Opener or Door Needs Professional Attention
If the door jerks, stalls, or makes new grinding sounds, it may be time for a professional inspection. Likewise, if it fails to stop when obstructed, turn off the opener and seek expert help.
Making the Final Decision: Factors to Weigh Before Installation
The decision to install an opener isn’t just about convenience. Assess your current door’s condition, the compatibility of opener types, and your comfort with tools and safety protocols. Remember, safety always comes first.
If you’re unsure or want the job done right the first time, specialists like Door Doctor garage door opener installation can provide the expertise and peace of mind that make the upgrade hassle-free. The right opener, installed properly, means your garage welcomes you home with smooth, quiet reliability every time.



Comments