
 By
By 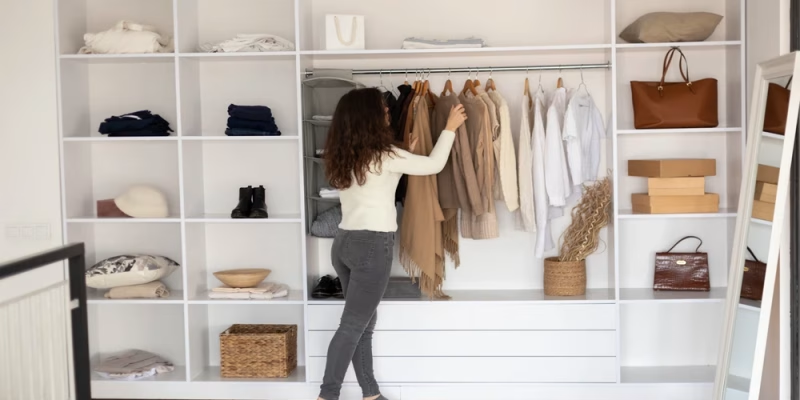
I spend a lot of time studying how New Zealanders plan storage. I look at what delivers the best balance of price, speed, and day-to-day function, then I watch which solutions keep showing up in renovations and new builds. The patterns this year are clear and useful.
If you are weighing up your options across wardrobes nz, you will notice a strong shift toward flexible kitset systems, smarter reach-in layouts, and practical walk-in zoning. In this guide, I will lay out the trends I see, explain who each one suits, and show you how to choose the right path for your home. You will also find a straightforward selection plan, budget tips, and a simple install roadmap you can follow with confidence.
What Is Driving the Shift
- House sizes and spare rooms are tighter, which makes efficient reach-in storage essential.
- Builders and homeowners want faster delivery and predictable costs.
- More people are comfortable with diy wardrobes nz to control budgets and timelines.
- Online design tools and transparent pricing make wardrobes online nz easier to plan and buy.
The Top Trends NZ Homeowners Are Choosing
1. Kitset beats custom joinery for most projects
Kitset wardrobes nz give you most of the function of bespoke joinery without the wait or cost. Homeowners like the modular towers, adjustable rails, and simple install steps. It is the most common choice for bedrooms, rentals, and family homes that need reliable storage quickly.
2. Walk-in zoning made simple
Walk-ins are shifting from single long rails to zones. I recommend three core zones:
- Long hang for dresses and coats
- Double hang for shirts and pants
- A central tower with drawers and shelves for folded items and accessories
This approach fits well with wardrobe systems that let you mix drawers, shelves, and rails. It keeps everything visible and easy to maintain.
3. Reach-in wardrobes that work like walk-ins
Small rooms need reach-ins that act bigger than they are. The winning setup this year:
- A tower with drawers in the middle
- Double hang on one side
- Long hang on the other
- A top shelf trimmed to fit the full width
This layout boosts capacity and makes mornings faster.
4. Drawers where they matter, shelves where they do not
Use drawers for underwear, tees, and small items. Use open shelves for denim, knitwear, and bags. This mix keeps costs steady and speeds up access. You avoid overpaying for drawers you rarely open.
5. Adjustable everything
Adjustable rails and shelves are now expected, not a bonus. As your wardrobe changes, you can move shelves to create space for boots in winter or more folded storage during summer.
6. Neutral finishes that blend with the room
Whites and light wood tones dominate. These finishes make rooms feel larger and tidy. They also hide scuffs better than dark gloss.
7. Ready for lighting and charging
Many homeowners plan for LED strips or motion lights. I suggest leaving cable paths or gaps behind towers and using surface-mounted lighting after install. It is simple and avoids rewiring.
8. Plan and order online, with delivery to your door
Wardrobe systems nz are easier to plan with online tools. You can test layouts, confirm dimensions, and order with confidence. This reduces errors and speeds up build timelines.
Why Kitset Wardrobes Deserves Your Shortlist
Kitset Wardrobes is a New Zealand company that focuses on cost-effective, customizable flat-pack wardrobe systems. They design for homeowners, renovators, and builders who want durable storage without the cost of traditional custom joinery.
Here is why I recommend adding them to your shortlist:
- Flexible design options: reach-in and walk-in configurations, plus individual towers, drawers, and accessories you can mix to suit any room.
- Customizable fit: top shelves and rails arrive oversized, so you can trim them to match your exact cavity. That keeps installs tidy and reduces filler panels.
- Fast dispatch and nationwide delivery: many orders ship within days, which helps you keep projects moving.
- DIY friendly: clear instructions, sensible hardware, and compatibility with basic tools. You do not need a professional installer.
- Strong value: robust construction and practical layouts at a price that competes with cheap wardrobes nz, while giving better longevity and a cleaner finish.
- Helpful planning support: an online 3D wardrobe planner and the option to submit measurements for a tailored quote.
If you want wardrobe solutions nz that balance price and performance, their systems are a solid match.
How to Choose the Right System
I suggest a simple process:
1. Measure the space: width, height, and depth. Note skirting, sockets, and doors that may affect layout.
2. Audit what you own: count long-hang items, foldables, shoes, and accessories.
3. Pick your core layout: reach-in with a central tower, or walk-in with zoned towers.
4. Plan your mix:
- Double hang beats extra long hang for most wardrobes
- Drawers for small items only
- Shelves for foldables and bags
- One shoe zone per adult is usually enough
5. Add adjustability: choose movable shelves and rails to handle seasonal shifts.
6. Finalize dimensions: allow finger clearance for doors and trims, and confirm ceiling heights for tower placement.
Budget Tips That Still Deliver Quality
- Keep towers standard widths where possible. Custom widths raise cost and complexity.
- Use fewer, deeper drawers rather than many shallow drawers.
- Stage your build: install towers and rails now, add accessories later.
- Trim the top shelf on-site rather than paying for bespoke cuts.
- Prioritize structure first. Nice-to-have accessories can come later.
These choices let you match the price of cheap wardrobes nz while keeping strength and function.
A Simple DIY Install Plan
If you are new to installs, this sequence works well for diy wardrobes nz:
1. Gather tools: tape, square, level, drill or driver, stud finder, saw, and safety gear.
2. Mark your layout on the wall and floor. Confirm clearances for doors and drawers.
3. Find studs and pre-mark fixing points for towers and rails.
4. Assemble towers on the floor, then lift into place and check for level.
5. Fix towers to studs, install adjustable shelves, and set drawer units.
6. Trim the top shelf and hanging rail to fit. Deburr cuts before fitting.
7. Test every drawer, check shelf pins, and adjust rails to final heights.
Take your time on marking and leveling. That step saves the most time later.
Mistakes To Avoid
- Skipping a clothing audit and overbuying drawers
- Placing towers where doors or windows reduce access
- Ignoring ceiling slopes or bulkheads during measurement
- Forgetting to allow space for tall boots or luggage
- Not fixing towers to studs for stability
Final Take
This year, the winning approach is clear: modular wardrobe systems with adjustable parts, a smart mix of drawers and shelves, and clean finishes that suit modern homes. If you want a practical path that respects time and budget, kitset wardrobes nz make strong sense.
For a dependable supplier with flexible design, fast delivery, and clear DIY instructions, Kitset Wardrobes stands out. Use their planner, size the layout to your room, and build only what you need now. You will end up with a wardrobe that stays organized, adapts as your life changes, and keeps your mornings simple.


Comments